
Column of Leaves: Free Lace Scarf Knitting Pattern
FREE KNITTING PATTERN · ACCESSORIES
A winding column of lace leaves, soft wool and a simple scarf shape. Brooke Nelson’s Column of Leaves is a lovely project for knitters ready to follow an eight-row lace repeat. The complete written pattern is below, with a project checklist and notes to help you keep your place.
Design by Brooke Nelson · Editorial adaptation by Hook & Hug
Jump to the free pattern ↓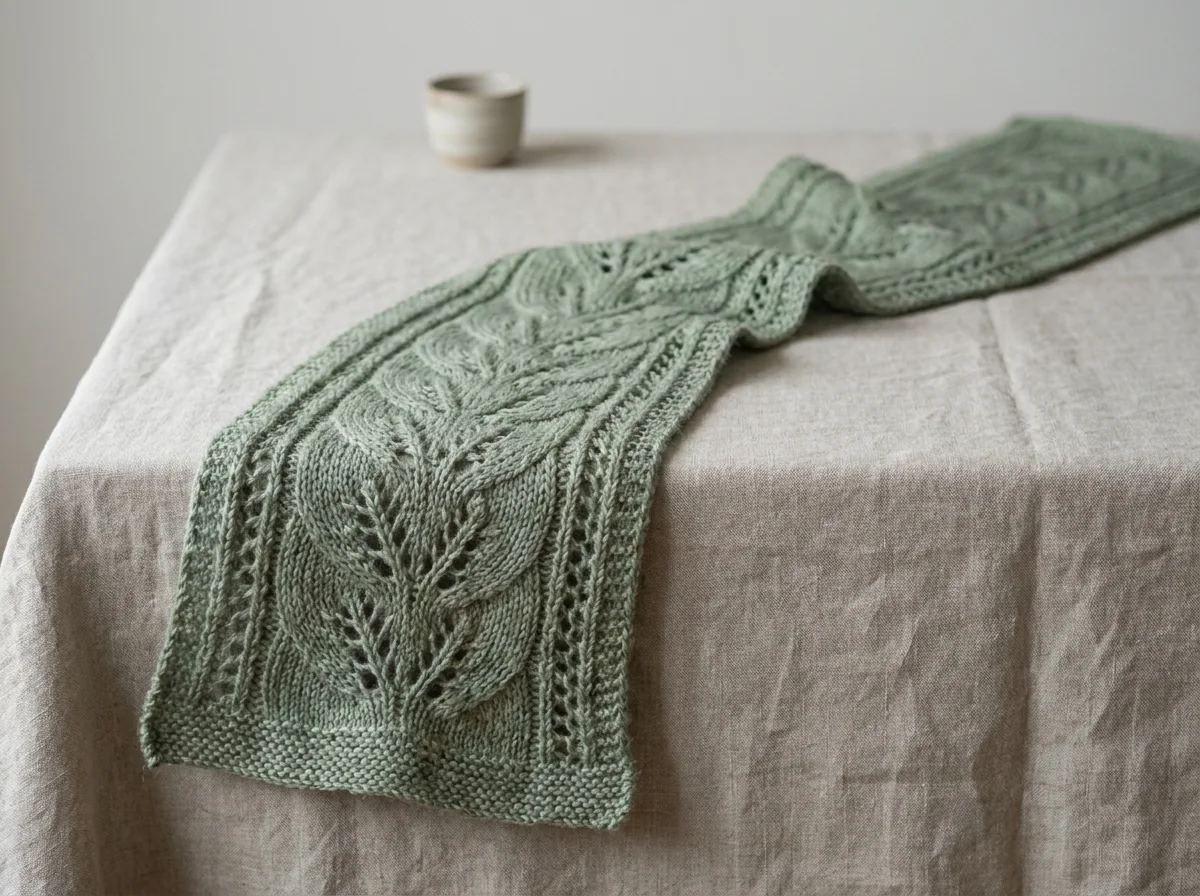
A closer look at the design
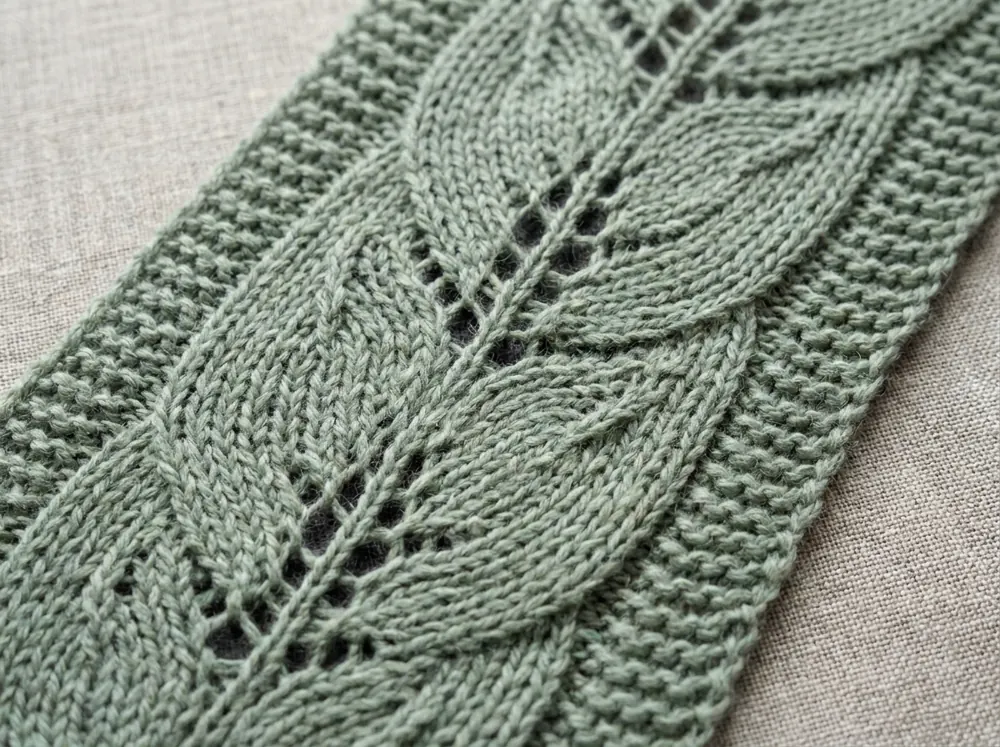
This is a narrow scarf worked flat. Yarn overs and paired decreases form the leaf motif; a small garter border helps frame the lace. There is no garment shaping or seaming, but the stitch pattern needs attention on both right-side and wrong-side rows. It suits someone already comfortable with knit and purl stitches who wants to practise lace.
- Craft
- Knitting, worked flat
- Repeat
- 8 rows
- Yarn
- Approx. 375 yd / 343 m, worsted
- Needles
- US 7 / 4.5 mm in the original PDF
- Original size
- Approx. 6 × 73 in / 15 × 185 cm
- Stitch count
- 39 after WS rows; 41 after RS rows
The original sample used Mountain Colors 4/8s wool. A different fibre, yarn weight or needle size changes the fabric, yardage and finished dimensions. No numerical gauge is supplied in the source. Make a swatch to check whether you like the lace and drape before committing to a full scarf.
What you’ll need
- About 375 yards of worsted-weight yarn for the original dimensions. Allow for your swatch and any extra length.
- US 7 / 4.5 mm needles as the starting point used in the original PDF.
- A tapestry needle to weave in the ends and scissors.
- Optional helpers: a row counter, a spare smooth thread for a lifeline and a blocking surface with suitable pins.
For the muted sage look, choose a softly tonal wool that still lets the lace show. Very busy colour changes can hide the leaf outline. The source also allows other yarn weights; choose needles appropriate to that yarn and expect a different result.
Stitches & abbreviations
- k / p
- Knit / purl.
- yo
- Yarn over.
- k2tog / p2tog
- Knit / purl two stitches together.
- p2tog tbl
- Purl two stitches together through the back loops.
- SKP
- Slip one, knit one, pass the slipped stitch over the knitted stitch.
- slip 1
- Slip one stitch knitwise, as specified by the designer.
- RS / WS
- Right side / wrong side.
Read this before the first row
The changing count is intentional. Cast on 39 stitches. Every right-side pattern row ends with 41; the following wrong-side row brings the count back to 39. Do not add or remove stitches simply to make every row have the same count.
The first and last stitch are slipped knitwise on RS rows and purled on WS rows. The next two stitches at each side are worked in garter stitch. These edges are already included in the row instructions; do not add extra border stitches.
Keep a written mark beside your current row. Check the stitch count before turning, especially during the first repeat. If you use a lifeline, record the row you have just completed so you know exactly where to resume.
THE COMPLETE WRITTEN PATTERN
Column of Leaves scarf
Original design and row instructions: Brooke Nelson. Reproduced under CC BY 3.0.
1. Cast on and work the lower border
Cast on 39 stitches.
WS border row: p1, knit across until the last stitch, p1.
RS border row: slip 1, knit across until the last stitch, slip 1.
Repeat these border rows for approximately 1 inch (about 8 rows in the original), or to your preferred border depth. Finish after a WS row.
2. Work the eight-row leaf repeat
Row 1 · RS
slip 1, k2, SKP, yo, k2, p2, k7, k2tog, yo, k1, yo, p1, yo, k1, yo, SKP, k7, p2, SKP, yo, k4, slip 1.
End with 41 stitches.Row 2 · WS
p1, k2, p2tog, yo, p2, k2, p6, p2tog tbl, p3, k1, p3, p2tog, p6, k2, p2tog, yo, p2, k2, p1.
End with 39 stitches.Row 3 · RS
slip 1, k2, SKP, yo, k2, p2, k5, k2tog, k1, (yo, k1) twice, p1, k1, (yo, k1) twice, SKP, k5, p2, SKP, yo, k4, slip 1.
End with 41 stitches.Row 4 · WS
p1, k2, p2tog, yo, p2, k2, p4, p2tog tbl, p5, k1, p5, p2tog, p4, k2, p2tog, yo, p2, k2, p1.
End with 39 stitches.Row 5 · RS
slip 1, k2, SKP, yo, k2, p2, k3, k2tog, k2, yo, k1, yo, k2, p1, k2, yo, k1, yo, k2, SKP, k3, p2, SKP, yo, k4, slip 1.
End with 41 stitches.Row 6 · WS
p1, k2, p2tog, yo, p2, k2, p2, p2tog tbl, p7, k1, p7, p2tog, p2, k2, p2tog, yo, p2, k2, p1.
End with 39 stitches.Row 7 · RS
slip 1, k2, SKP, yo, k2, p2, k1, k2tog, k3, yo, k1, yo, k3, p1, k3, yo, k1, yo, k3, SKP, k1, p2, SKP, yo, k4, slip 1.
End with 41 stitches.Row 8 · WS
p1, k2, p2tog, yo, p2, k2, p2tog tbl, p9, k1, p9, p2tog, k2, p2tog, yo, p2, k2, p1.
End with 39 stitches.3. Continue to your chosen length
Repeat Rows 1–8 until the scarf is the length you want. Allow yarn for the upper border and binding off. Then repeat the garter border instructions, bind off and weave in the ends.
Let the leaves open: finishing & blocking
The designer specifically calls out blocking to help the lace lie flat and the leaves become defined. Follow your yarn’s care instructions. Shape the damp scarf evenly without pulling the borders out of proportion, then leave it undisturbed until completely dry. If your fibre needs a different blocking method, follow the yarn manufacturer’s guidance.
Before putting the scarf away, check the ends and the two borders. Keep a project note with your yarn, needle size and final measurements; those details make a future version easier to plan.
A few useful questions
Can I make it shorter?
Yes. The source allows you to change the length by working fewer or more repeats. Keep enough yarn for the upper border. Yardage will change.
Why do I have 41 stitches?
That is correct after an RS pattern row. Check for 39 after the following WS row. Compare your work with the row you have actually just finished.
Is there a chart?
Yes. Brooke’s original free PDF includes the written pattern and a chart. The grey chart squares represent missing stitches; the source explains their relationship to the changing count.
Has Hook & Hug sample-tested this version?
This is a credited editorial adaptation of the published pattern. We have checked the written sequence against the source, but have not yet knitted a physical sample. The colour studies are inspiration, not a guarantee of finished dimensions.